
Picking the wrong bike size can turn a relaxed vacation ride into a fussy, awkward chore fast. This e-bike size guide keeps it simple: figure out what kind of ride suits your trip, take two quick measurements, and use a few fit checks that actually matter once the bike starts moving.
What you’ll need before you size an e-bike
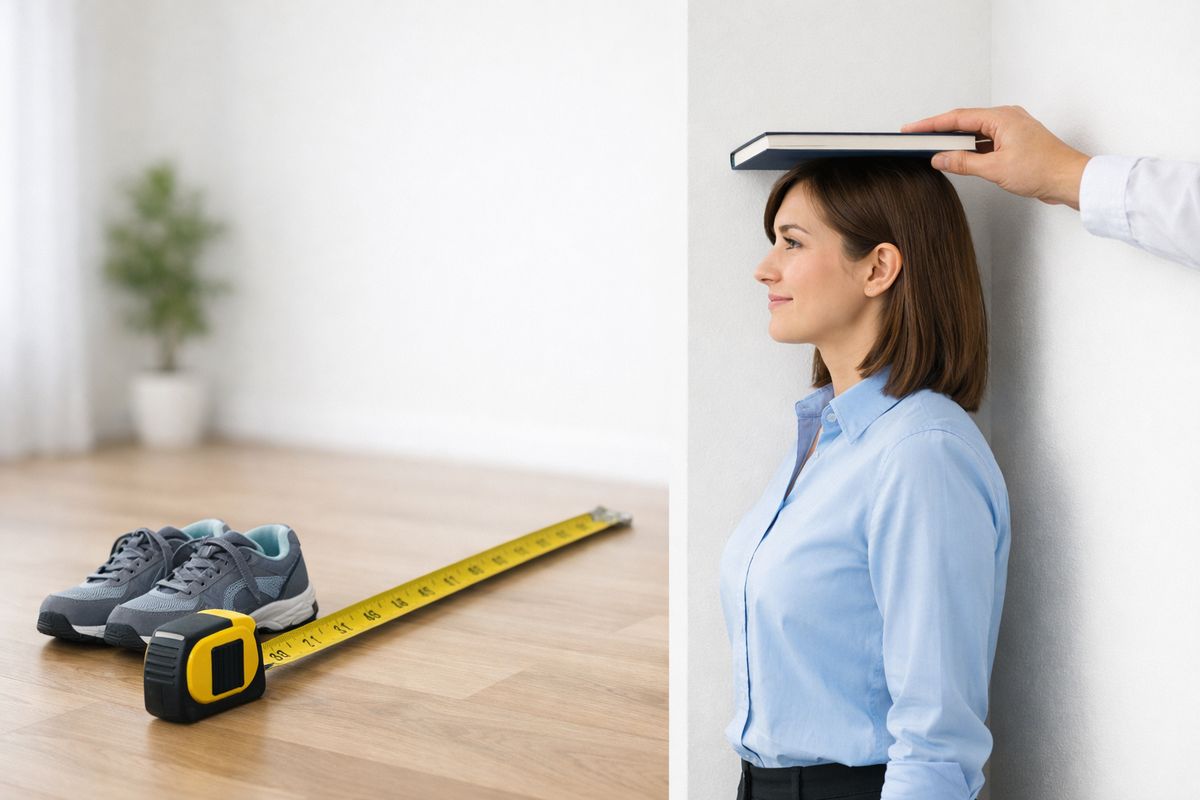
Before you compare charts or browse rental listings, get four things: your height, your inseam, the shoes you plan to ride in, and a tape measure. That’s enough to narrow your options quickly without falling into bike-shop rabbit holes.
The main thing to remember is that fit is not about chasing a perfect number. It’s about comfort and control. If you can get on easily, stop without wobbling, and pedal without feeling cramped or stretched, you’re on the right track.
If you’re planning beach cruising in Naples or an easy ride around Marco Island, comfort matters even more than sporty efficiency. Vacation riding should feel easy, especially when the heat kicks in by late morning.
Step 1: Start with how you’ll actually use the e-bike
- Think about where you’ll ride most.
- Decide how far you want to go in one outing.
- Notice whether you want a relaxed cruise, quick errands, or longer sightseeing loops.
- Rule out bikes built for uses you don’t need.
- Only then start looking at size.
This step saves time because bike style changes fit. A laid-back cruiser and a utility-focused cargo e-bike can both be labeled “medium” and still feel completely different.
Match the bike to your trip, not just your height
- Picture your most likely ride.
- Match the bike to that ride.
- Ignore flashy features you will not use.
For casual sightseeing around Naples, an upright comfort-focused e-bike usually makes the most sense. If your plan is short rides to coffee, dinner, or the beach, easy mounting and relaxed posture matter more than aggressive geometry. For longer loops around Marco Island, especially if you want to cover more ground without arriving sweaty, a hybrid-style e-bike with a slightly more efficient position can feel better.
Here’s the trick: your height tells you where to start, but your trip tells you what “right fit” actually means.
Know the basic e-bike styles in plain English
- Cruiser: relaxed, upright, easygoing.
- Hybrid: a middle ground, stable and versatile.
- Fat tire: wider tires, more planted feel, more bulk.
- Step-through: low frame opening, easier on and off.
- Cargo: built to carry more, usually heavier.
Most rental riders do best on a cruiser, hybrid, or step-through. City and urban e-bikes dominate the market for a reason: they’re built around comfort, simple handling, and everyday riding, not racing posture.
Notice when an e-bike makes more sense than a regular bike
- Think about heat.
- Think about bridges or headwinds.
- Think about distance.
- Think about how hard you want to work.
- Pick the option you’ll actually enjoy using.
If you’re choosing between a regular bike and an e-bike, make the easy call. E-bikes shine when the weather is hot, the ride is longer than expected, or you want to keep the outing low effort. Pedal-assist models make up most of the market, which makes sense because they still feel like riding a bike, just with the rough edges sanded off.
Step 2: Measure your height and inseam the quick way
- Put on your usual riding shoes.
- Stand by a wall with a tape measure.
- Measure your height.
- Measure your inseam.
- Write both numbers down.
That’s the whole process. No fancy tools, no need to overthink it.
Measure your height accurately
- Stand straight against a wall.
- Keep your heels flat on the floor.
- Look straight ahead.
- Place a book flat on top of your head.
- Mark the wall and measure from floor to mark.
An inch matters more than most people expect. It can push you from one size range into another, especially if you’re already near the edge of a small or medium frame.
Measure your inseam without bike-shop drama
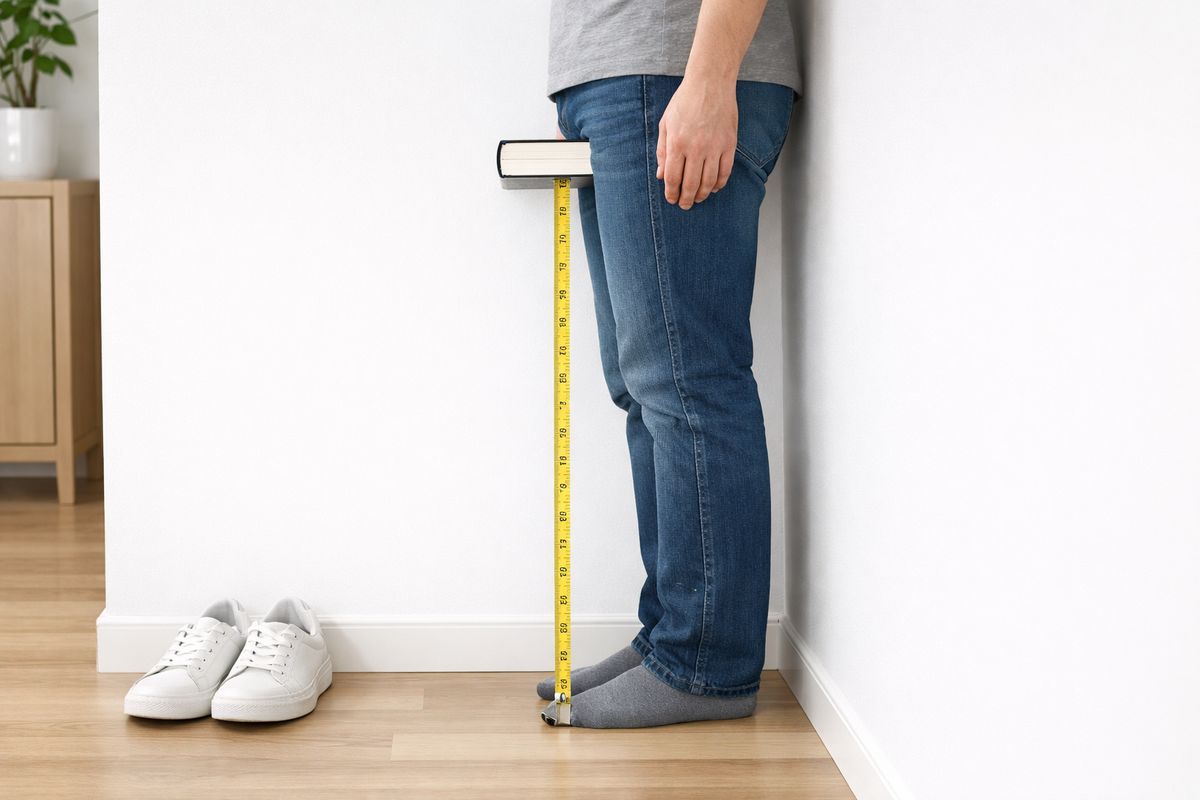
- Stand with your back to a wall.
- Hold a book snugly between your legs, like a bike saddle.
- Raise it until it feels firm but natural.
- Measure from the floor to the top of the book.
- Write that number down.
Your inseam is the distance from the ground to your crotch. Simple. And honestly, it often matters more than total height, especially on step-over bikes where top-tube clearance can make or break your confidence at a stop.
Write down your numbers before you compare bikes
- Save your height in inches.
- Save your inseam in inches.
- Keep the numbers on your phone.
- Use the same numbers on every listing.
- Double-check before booking.
Guessing from memory is how people end up renting a bike that almost fits. “Almost” is annoying for ten minutes and miserable for a full afternoon.
Step 3: Use an e-bike size chart as your starting point
- Find the chart for the bike you want.
- Match your height first.
- Use your inseam as the tie-breaker.
- Narrow it to one or two sizes.
- Move on to real fit checks.
Size charts are helpful, but they are not the final answer. They get you close. The rest comes from frame style, weight, and how the bike feels once you’re on it.
Understand letter sizes vs. frame measurements
- Look for Small, Medium, and Large labels.
- Check whether the brand also lists inches or centimeters.
- Compare both if available.
- Do not assume all mediums are alike.
Some e-bikes use letter sizes. Others list frame numbers, usually in inches or centimeters. A small frame might be 15 inches on one model and something slightly different on another. Letter sizes are easier to scan, but the numbers tell you more.
Check the chart for the specific bike model
- Open the exact product or rental page.
- Find that bike’s size range.
- Ignore generic charts if a model-specific chart exists.
- Compare your measurements there first.
One brand’s medium can absolutely feel like another brand’s large. That’s normal. Even battery placement, wheel size, and handlebar shape can change the feel of the bike enough to make a generic chart useless.
Use a simple electric bike size chart example
- Use this as a rough filter.
- Confirm with the bike’s actual chart.
- Test fit before committing if possible.
| Size | Height | Inseam |
|---|---|---|
| Small | 5’0″ to 5’5″ | 27″ to 30″ |
| Medium | 5’5″ to 5’10” | 29″ to 32″ |
| Large | 5’10” to 6’2″ | 31″ to 35″ |
Treat those ranges as a quick reference, not a promise.
Step 4: Account for e-bike features that change the fit
- Notice the frame shape.
- Notice where the battery sits.
- Notice how heavy the bike feels.
- Notice your riding posture.
- Re-check your size choice with those details in mind.
This is the part many guides skip. E-bikes are heavier than regular bikes, sometimes by a lot. Weight ranges can vary widely, and that extra heft changes how secure a bike feels when you start, stop, or walk it.
Step-through vs. step-over frames
- Choose step-through if easy access matters.
- Choose step-over if you like a more traditional frame feel.
- Prioritize confidence getting on and off.
A step-through frame is often the smartest pick for casual vacation riding. It’s easier to mount in sandals or sneakers, easier to handle at stop signs, and less awkward if flexibility is not your favorite thing anymore. A step-over frame can feel more familiar, but the catch is that it asks more from you at every stop.
Why battery and motor placement affect handling
- Look for where the battery sits.
- Notice whether the bike feels balanced.
- Pay attention at low speed.
A battery mounted low and centrally usually feels steadier. That’s because the center of gravity stays lower, which helps when turning slowly or stopping near traffic, sidewalks, or crowded beach paths. A rear-heavy bike can feel like it wants to tip more than you expected.
Upright comfort vs. sportier reach
- Sit on the bike.
- Notice your back, shoulders, and wrists.
- Decide if the posture fits your trip.
For sightseeing and casual errands, upright wins. A more forward-leaning position can feel efficient on longer rides, but if your main goal is to cruise near Tigertail Beach or ride to dinner without fuss, a relaxed reach is usually the better fit.
Step 5: Choose the right size if you fall between two options
- Check whether you are near the top or bottom of a size range.
- Think about your inseam.
- Think about your comfort level.
- Use control as the deciding factor.
- Pick the bike you can manage easily at a stop.
If you are between sizes, there is a good default rule: size down for comfort and control unless you have a clear reason not to.
Size down for easier control and a more relaxed feel
- Choose the smaller size for casual riding.
- Choose it if you are new to e-bikes.
- Choose it if easy starts and stops matter most.
Better control beats a stretched-out fit every time. A slightly smaller bike is usually easier to steady, easier to mount, and less intimidating in parking lots, crosswalks, and bike path bottlenecks.
Size up for longer legs or a more extended riding position
- Choose the larger size if your inseam is long for your height.
- Choose it if you prefer more room while pedaling.
- Skip it if the bike feels awkward at stops.
A bigger frame can work nicely if you have long legs and want a little more extension. But bigger is not better if you feel perched too high or have to think too hard every time you put a foot down.
Use comfort at a stop as the tie-breaker
- Get on the bike.
- Stop fully.
- Put a foot down.
- Steady the bike.
- Notice whether it feels natural.
If two sizes look close on paper, the one that feels calm and easy at a stop is the right one.
Step 6: Adjust the contact points before judging the fit
- Set the saddle height.
- Check saddle fore-aft position if adjustable.
- Check handlebar reach.
- Re-test mounting and stopping.
- Judge the bike only after those tweaks.
A good bike can feel wrong if the setup is off by even a little. That’s especially true with rental bikes that get adjusted for different riders all the time.
Set saddle height for a smooth pedal stroke
- Sit on the saddle.
- Put one heel on a pedal.
- Rotate that pedal to the bottom.
- Lower or raise the seat until your leg is almost straight.
- Re-check while pedaling normally.
Once you pedal with the ball of your foot, your knee should keep a slight bend at the bottom of the stroke. Too high and your hips rock. Too low and your knees start complaining.
Check handlebar reach and hand comfort
- Hold the bars in your normal position.
- Keep your elbows slightly bent.
- Relax your shoulders.
- Notice wrist pressure.
- Adjust if the bike allows it.
You should not feel like you’re reaching across a kitchen counter to grab something in the back corner. Your hands should land naturally, with no locked elbows or shrugged shoulders.
Test standover clearance and easy mounting
- Stand over the frame if it is a step-over.
- Check for a little room above the top tube.
- Mount and dismount twice.
- Repeat with your riding shoes on.
If you barely clear the top tube, that matters. If you have to perform a small acrobatic move to get on, that matters even more.
Step 7: Take a short test ride and notice the right things
- Ride for a few minutes.
- Start and stop several times.
- Turn at low speed.
- Try pedal assist.
- Pay attention to your body.
Consumer Reports strongly recommends test-riding any e-bike before buying, and the same logic applies to rentals whenever a quick tryout is possible. You learn more in three minutes of actual riding than in twenty minutes of staring at a chart.
Start, stop, and turn at low speed
- Begin in a low assist setting.
- Start smoothly.
- Brake to a full stop.
- Turn in a small circle.
- Repeat once more.
A good fit feels steady right away. You should not feel top-heavy, twitchy, or like the bike is steering you.
Try the pedal assist on a small incline
- Find a mild rise or bridge.
- Increase assist one level.
- Pedal seated.
- Notice your balance and posture.
A small incline reveals a lot. Around Marco Island, even a short bridge can show whether the bike supports you well or makes you feel pushed around. Some local rentals advertise 25 to 55 miles of range, but range only helps if the bike fits well enough that you want to stay on it.
Listen to your body, not the sales pitch
- Notice knee strain.
- Notice hand numbness.
- Notice lower-back tension.
- Notice if you feel too high off the ground.
- Trust that first impression.
If a bike feels off in the first few minutes, wishful thinking rarely fixes it.
Step 8: Pick the safest, simplest fit for your comfort level
- Be honest about your riding confidence.
- Choose the easiest setup that still suits your plans.
- Ignore what looks coolest.
- Pick what feels manageable now.
The best vacation e-bike is not the one that makes you feel ambitious. It’s the one that makes you want to ride again tomorrow.
Best fit choices for first-time e-bike riders
- Start with a step-through frame.
- Pick an upright riding position.
- Choose moderate tire width.
- Keep the bike easy to mount and easy to stop.
That combination removes a lot of friction. Less climbing over the frame, less leaning forward, less second-guessing.
What couples and families should check before booking
- Compare each person’s height and inseam separately.
- Think about flexibility and confidence, not just size.
- Check age rules for younger riders.
- Make sure both bikes suit the actual plan.
One mismatched bike can throw off the whole outing. If one person feels cramped or nervous, that bike usually gets parked early while the rest of the day bends around it.
When a trike or another vehicle may be the better fit
- Switch to a trike if balance is a concern.
- Choose a golf cart for very low-effort group transport.
- Pick a standard bike if you want lighter handling and shorter rides.
Sometimes an e-bike is not the easiest answer. If stopping and balancing feels stressful, a trike may be the better fit. If the plan is mostly short hops with bags, coolers, or multiple passengers, another vehicle may make more sense.
Troubleshooting: Common e-bike sizing mistakes and quick fixes
A lot of fit problems are setup problems, not sizing disasters. Fix the obvious things first.
The seat feels too high or too low
If your hips rock side to side, the seat is probably too high. If your knees stay heavily bent through the whole pedal stroke, it’s too low. Adjust the saddle first, then ride again. If the seat still cannot get you into a comfortable range, the frame size is probably off.
You feel stretched out or cramped
If your arms are reaching too far, try moving the saddle slightly forward or adjusting the stem if the bike allows it. If your knees feel crowded and your torso feels folded up, the bike may be too small. Small tweaks can help, but only up to a point.
The bike feels too heavy or hard to control
Sometimes the issue is not frame size alone. It’s the overall heft, frame shape, and how confident you feel at stops. A step-through model or slightly smaller frame often fixes that faster than trying to “get used to it.”
Your knees, hands, or lower back start to complain
Knee pain often points to saddle height. Sore hands can mean too much reach or too much weight on the bars. Lower-back tension usually means your posture is too stretched out for the kind of riding you’re doing. Your body is giving you useful feedback, so listen.
What the right fit should feel like on your first real ride
The right fit feels boring in the best way. You get on without thinking about it, pedal without fidgeting, and stop without that little flash of panic that says the bike is running you instead of the other way around.
Your shoulders stay relaxed. Your knees track smoothly. Your hands are comfortable. And when you roll along a sunny stretch near the water, your attention goes to the ride itself, not to whatever part of your body is annoyed.
Try this this week: Use your measurements to shortlist two e-bikes
Measure your height and inseam, save both numbers in your phone, and compare two e-bike options side by side this week. Pick the one with the easier frame style, the more relaxed posture, and the fit that feels simple at a stop, because that’s usually the bike you’ll enjoy from the first ride.